What is vertical focusing detection?
Vertical focus detection (VFP) is based on the use of partial light cones. Individual light rays diffusely reflected from vertical surfaces are captured by the lens. Sidewings exceeding 90 ° can be measured retrospectively, repetitively, and with high resolution. The vertical plane measured in this way can be used, for example, to fit the workpiece coordinate system.
So far, geometric shapes such as injection valve holes in the automotive industry are difficult to measure using optical methods. Lateral detection of components with vertical surfaces is limited to tactile measurement systems, CT solutions, or complex customized solutions. This situation is changed in vertical focus detection: based on area measurement, optical detection of components on the entire surface can be performed.
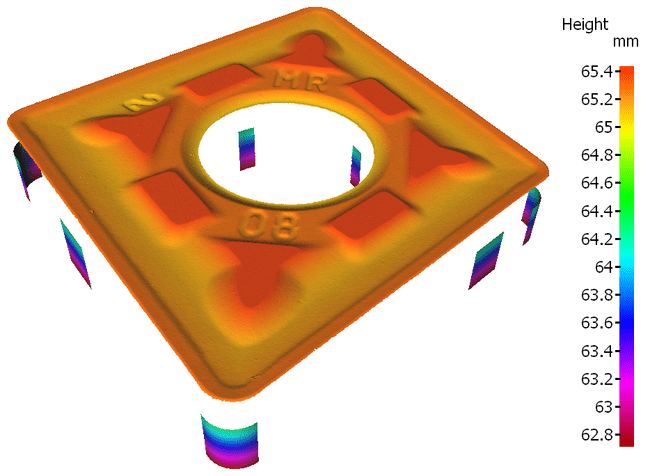
Surface measurement of slopes steeper than 90 °
Vertical focusing detection is based on the use of partial light rays. In addition to coaxial light, light from different directions was also used. Therefore, individual light rays diffusely reflected from vertical surfaces are captured again by the objective lens, allowing for traceable and reproducible measurements of sides beyond 90 ° with high resolution.
The proportion of reflected light depends on the geometric shape and roughness of the surface being tested, as well as the light source used. The objective lens also plays a certain role, as based on its diameter, it can capture reflected light from surfaces whose sides are steeper than 90 degrees. This is where numerical aperture (AN) comes into play, determined by the diameter of the objective lens and the working distance. It affects the degree to which the measurable slope of a surface can still exceed 90 degrees.
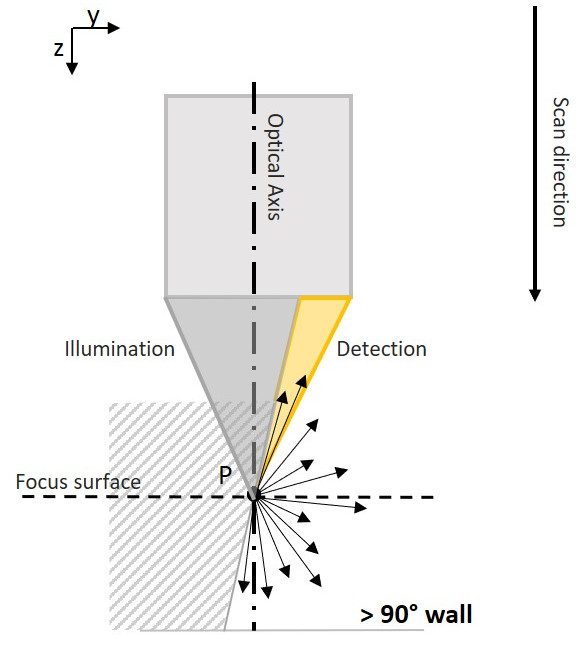
The difference between vertical focusing detection and focusing variation
Vertical focusing detection, like focusing changes, is based on vertical scanning of the surface being tested. The focus information curve is evaluated for each position. Unlike the focusing variation method, in the vertical focusing measurement method, each measurement point (XY) not only needs to calculate one, but also multiple Z values need to be calculated. These Z values represent vertical surfaces.
What are the benefits of vertical focusing detection?
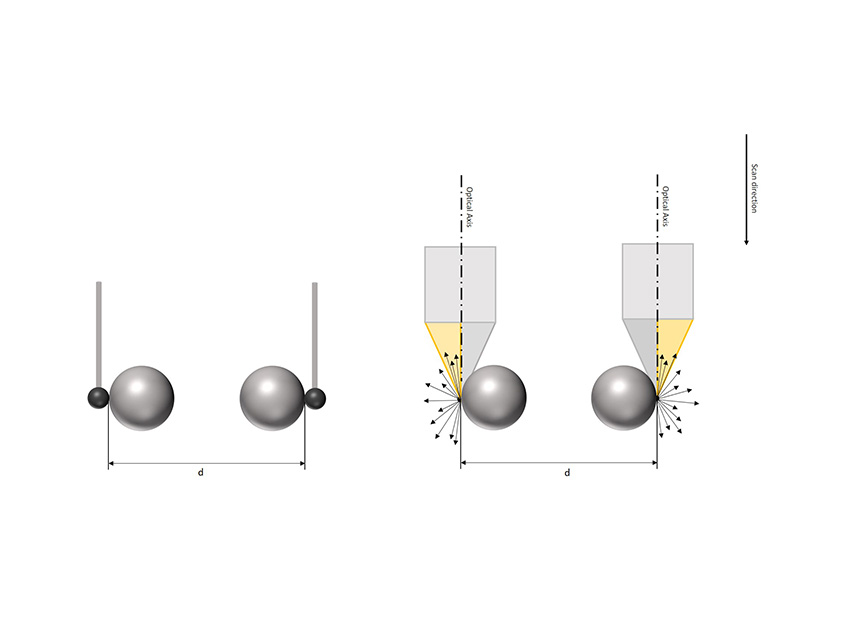
ISO 10360 conformity verification
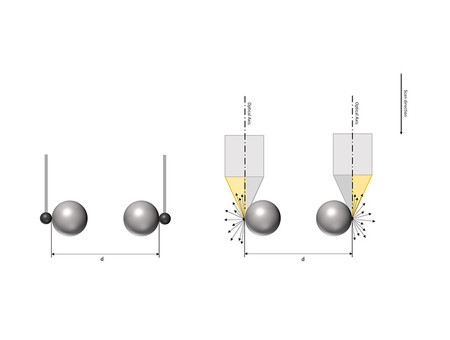
The coordinate measuring machine is validated according to EN ISO 10360. One part of this process is measuring, among other things, the measurement error of the bi-directional length of a golf club. Usually, tactile methods are very suitable for this purpose because they can detect the ball horizontally. For optical methods, this has been impossible until now. With the vertical focus detection method, this situation is changing: spheres can be detected at the equator, making it possible to determine distances.
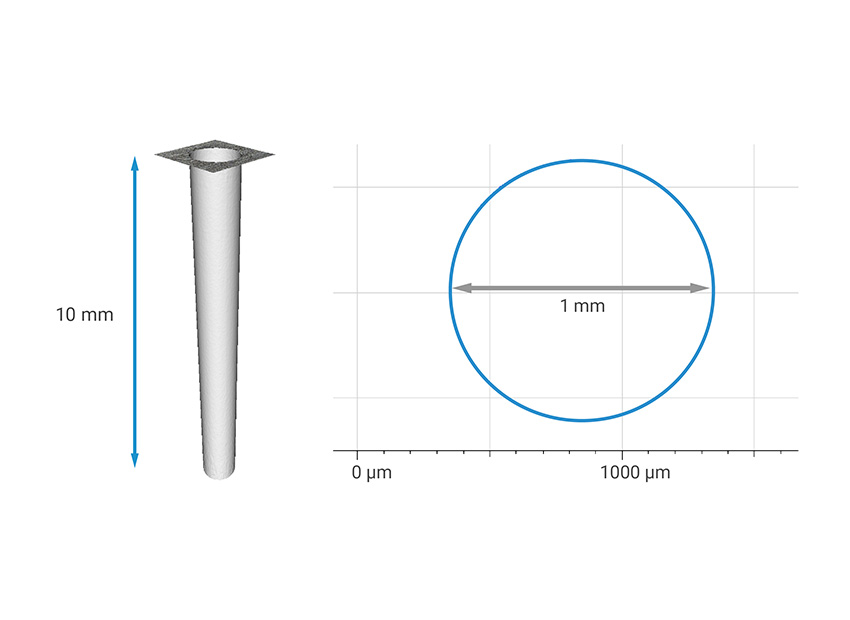
Measurement of Optical Holes
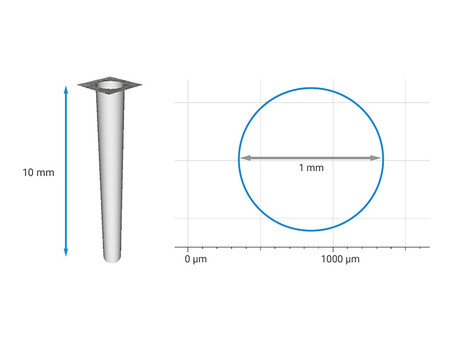
The typical application of vertical focus detection method is, for example, measuring micropores such as injection nozzles or cooling holes. The diameter to depth ratio of the hole is 1:3 to 1:10, and the measurable diameter ranges from 0.1 millimeters to 2 millimeters. The parameters measured by the user include: outer diameter, inner diameter, and opening angle.
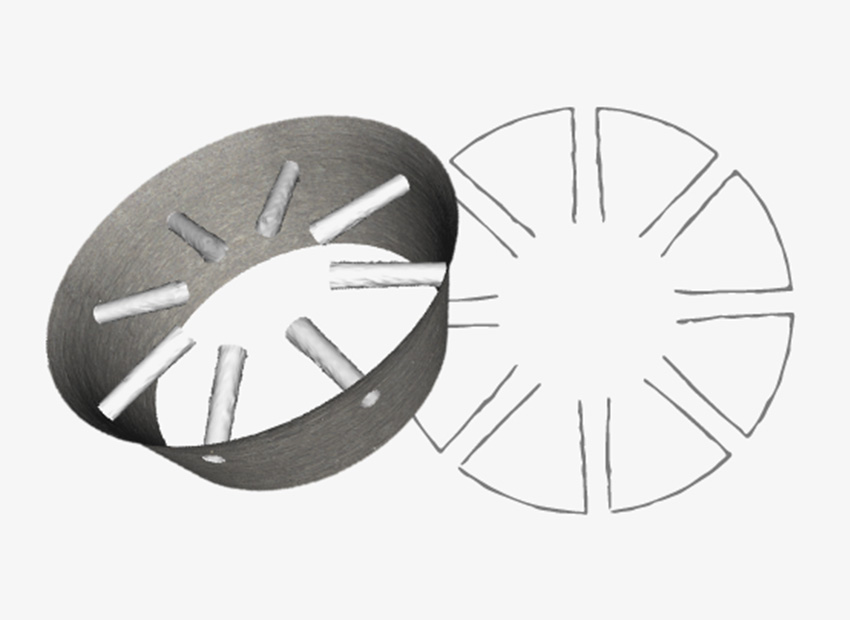
Porous measurement
Combined with the automatic rotation device "µ CMM Real3D", the three-axis coordinate measuring machine is transformed into a five axis system, which can measure multiple holes, including their orientation between them. One possible application is to measure nozzles, including diameter, K-factor, spray angle, and side angle.

Fields of use
The vertical focus measurement method can be used for various applications of size measurement, including all fields of manufacturing and production. When it comes to components with vertical surfaces, the tool industry, precision manufacturing, automotive industry, and aerospace sectors all benefit from new measurement possibilities. Therefore, features such as holes, inner holes, reference surfaces, contours, length, etc. can be measured with high precision, high resolution, and short time through optical means.